How to apply for a NOC (No Objection Certificate) online for study abroad | Easy steps to get a NOC from Nepal
Confused about applying for a No Objection Certificate (NOC) online? Don’t worry! In this article, we’ll explore easy steps on how Nepali students can apply for NOC online and obtain it without any trouble, making it easier for you to pursue your studying abroad dream.
What is the purpose of a NOC?
A No Objection Certificate (NOC) serves an important role for Nepalese students planning to study abroad. Here’s why it’s essential:
- Official Authorization: It signifies that the Nepalese government has officially authorized you to pursue education abroad.
- Financial Transactions: It allows you to make payments to the foreign university mentioned in the NOC, facilitating the financial aspect of your overseas education.
- Bank Transactions Requirement: When arranging payments for your education, banks will require the NOC to process transactions to the specified institution.
- Institution-Specific: Payments can only be made to the institution listed in the NOC. If you plan to study at more than one institution or in different countries, you’ll need separate NOCs for each.
- Currency Conversion: The NOC is necessary for converting Nepalese rupees (NPR) into foreign currencies, which is crucial for managing your finances abroad.
Documents required for the NOC online application
- Offer Letter: This includes any of the following: I-20, Letter of Acceptance (LOA), or any other form of acceptance letter indicating you’ve been offered a place in a foreign institution.
- Academic Certificates: You need to submit your educational transcripts, migration certificate, and provisional certificate.
- Language Proficiency Certificates: If you have taken an English language proficiency test such as IELTS or PTE, a certificate indicating your score can be submitted.
- Passport: A scanned copy of your passport
- Citizenship Certificate: A scanned copy of your citizenship certificate.
- Photo: A recent passport-sized photograph.
Steps to apply for the NOC online application
1. Mobile number entry and verification
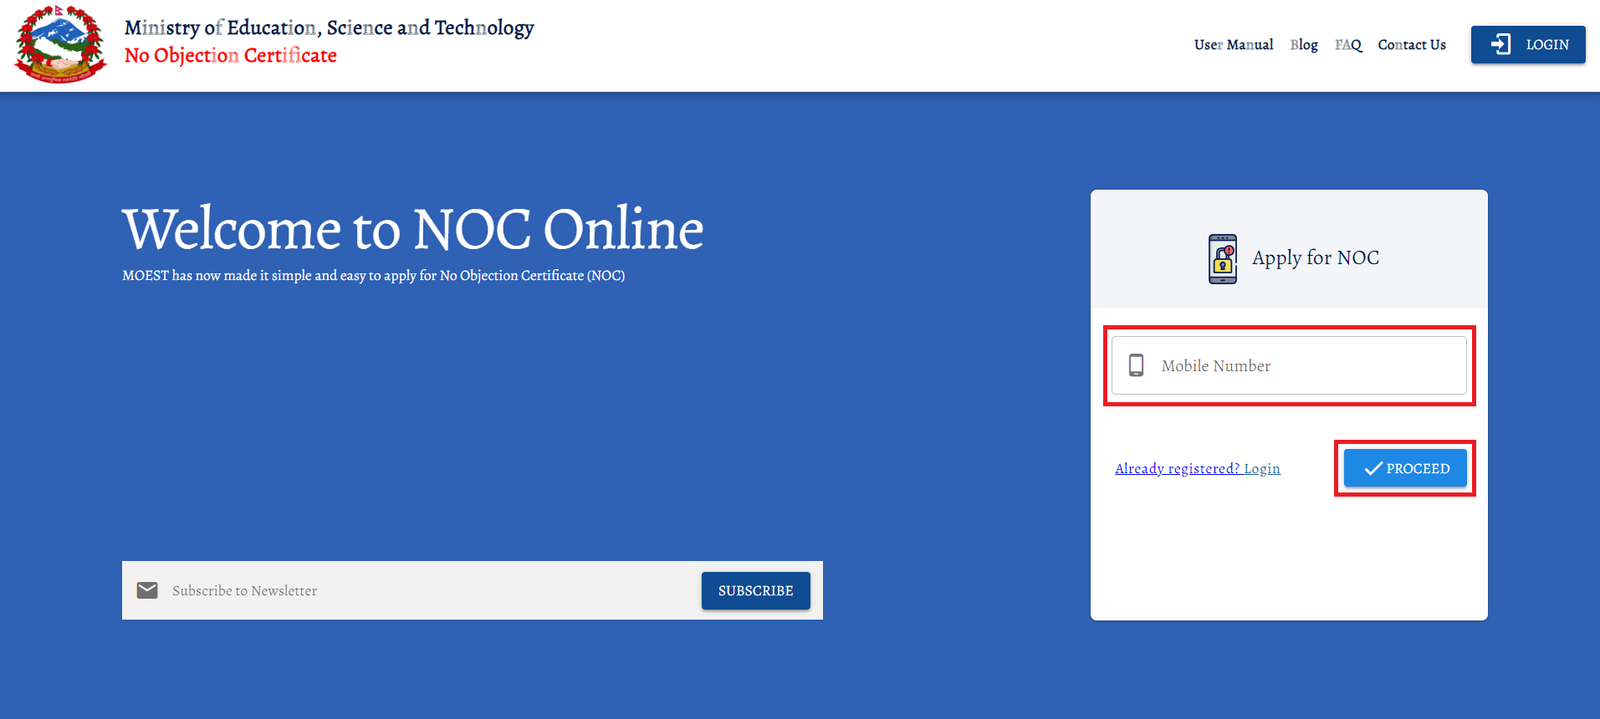
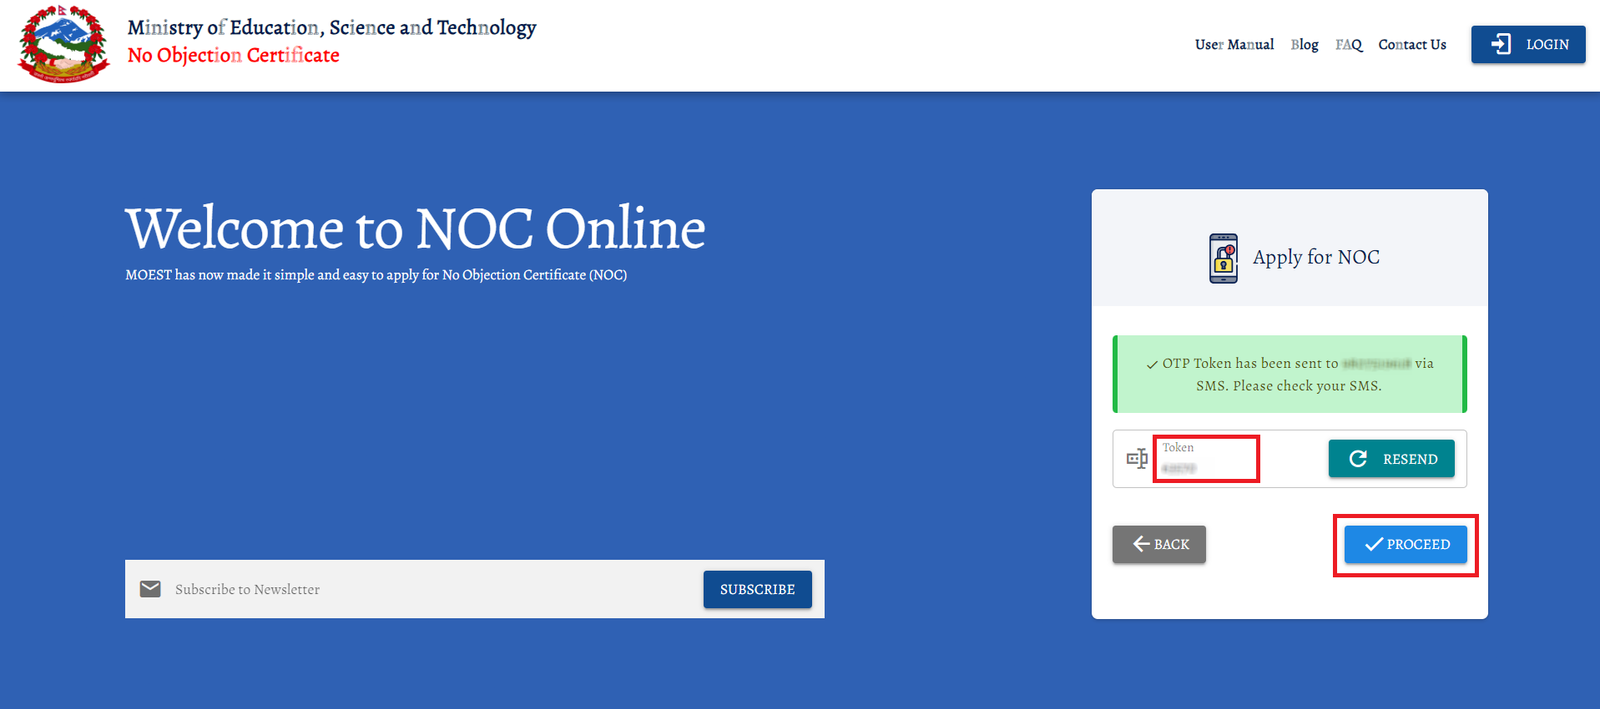
Visit the official NOC application portal and begin by entering your mobile number into the provided field. Once submitted, a one-time password (OTP), also known as a token, will be sent to your phone via SMS. Retrieve this token from your SMS messages and enter it back on the website to verify your mobile number and initiate the application process.
2. Create your password
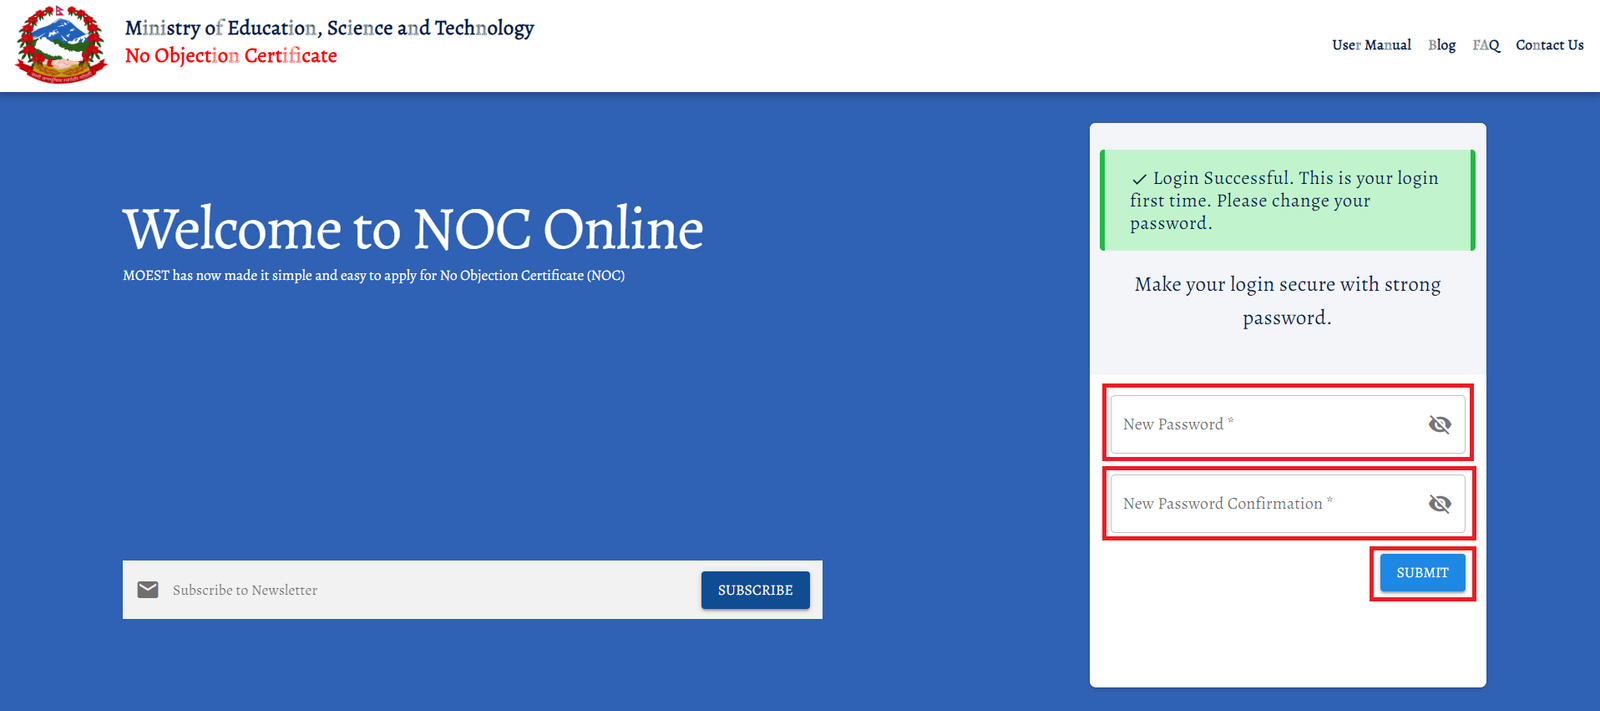
As a new user, after verifying your mobile number, you’ll be prompted to create a password. Choose a secure password, confirm it by entering it twice, and then click on the “Submit” button.
3. Email verification
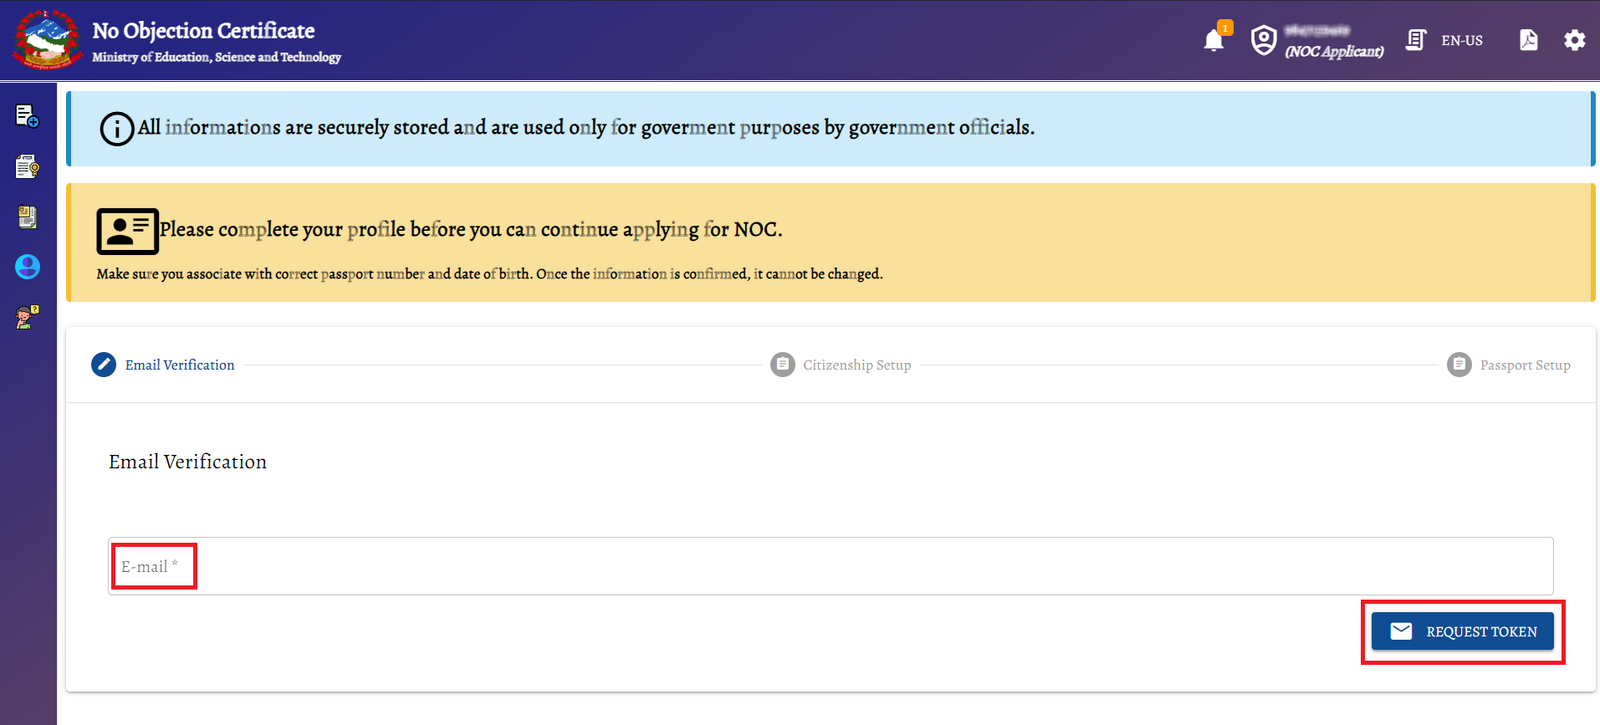
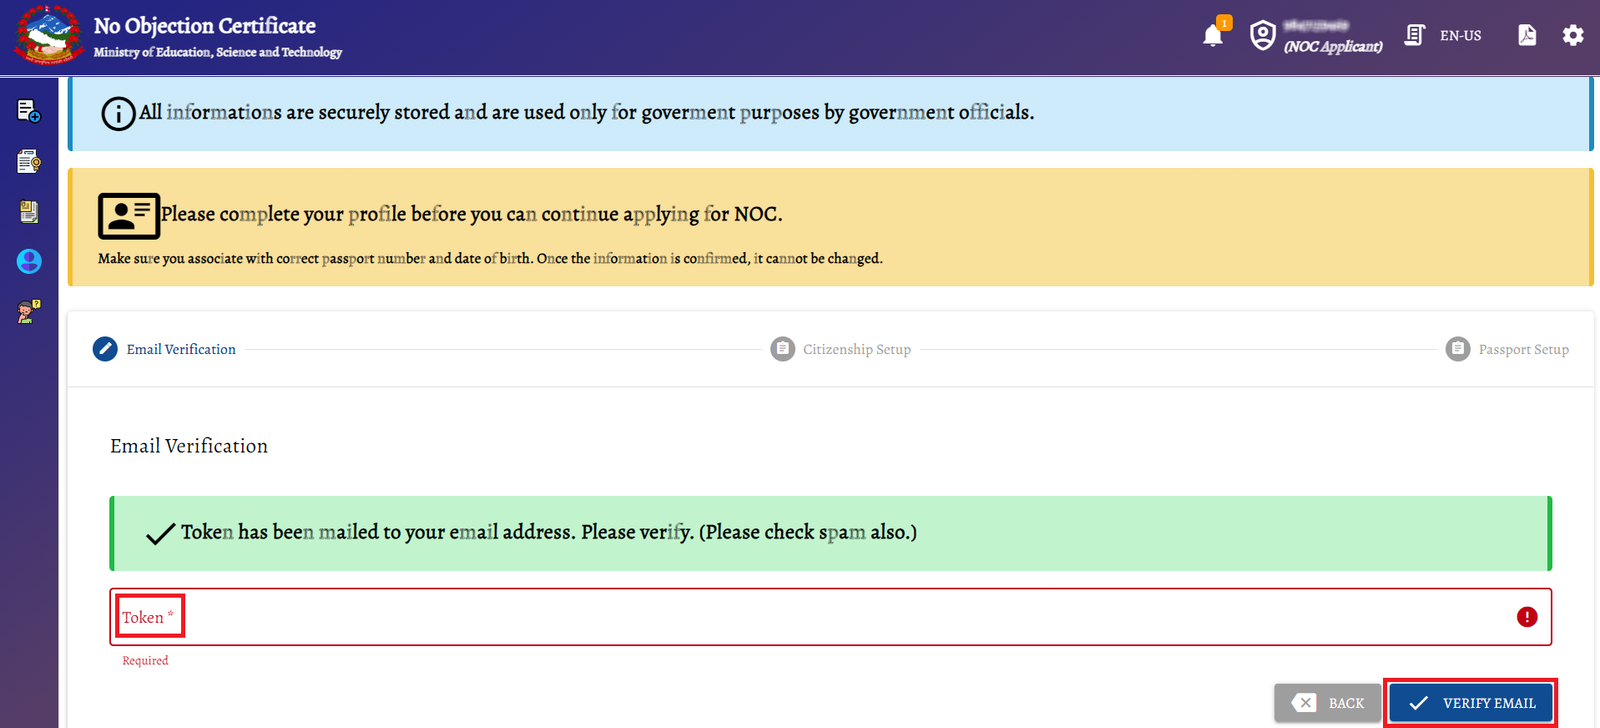
Next, you’ll be asked to provide your personal email address. Once submitted, a verification token will be sent to this email. Check your inbox, or possibly check your spam folder as well. Enter the token on the website to verify your email. To finalize the verification process, click on the “Verify Email” button. This will confirm your email address as your primary contact for any further notifications.
4. Completing the citizenship setup
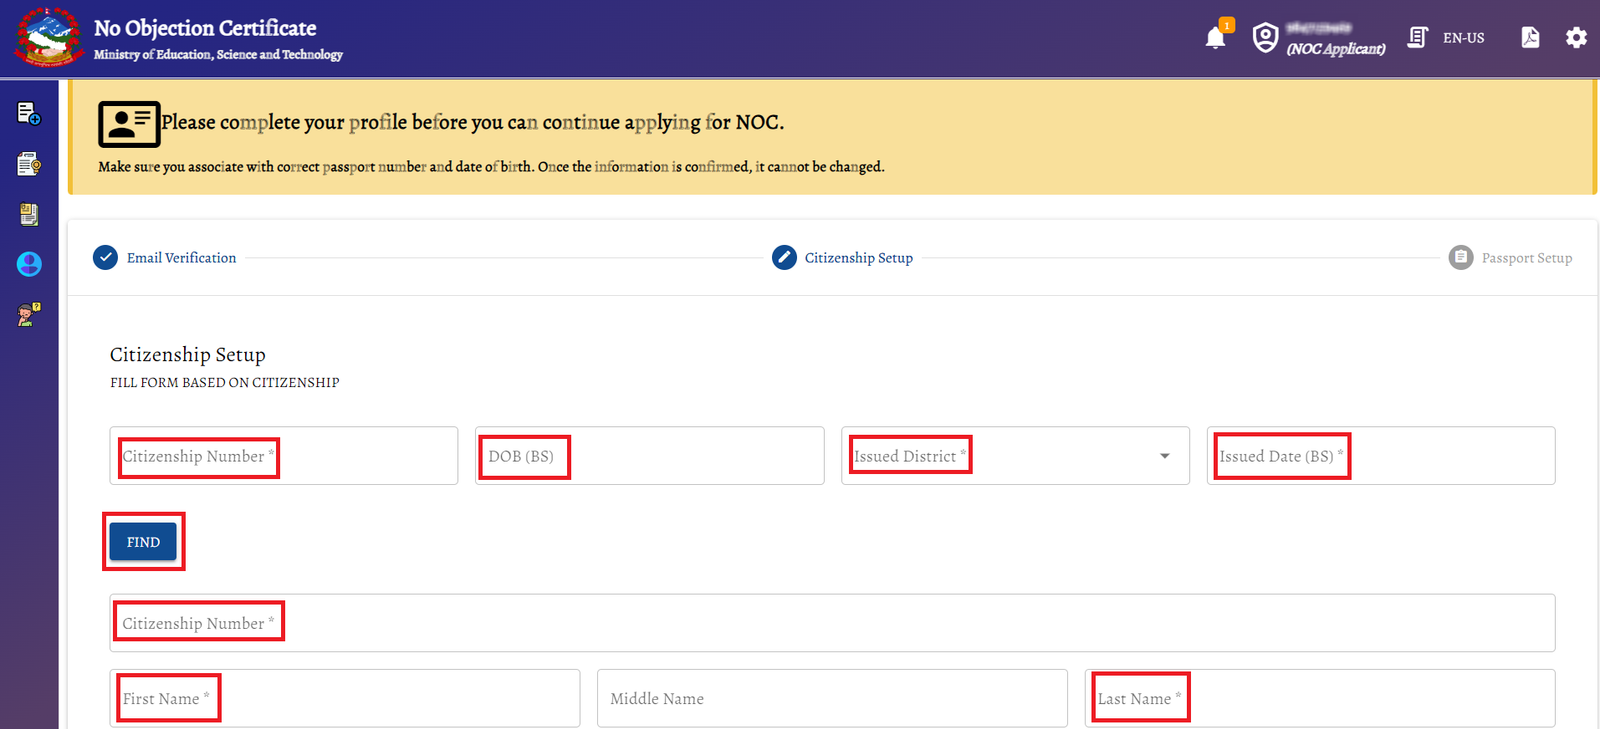
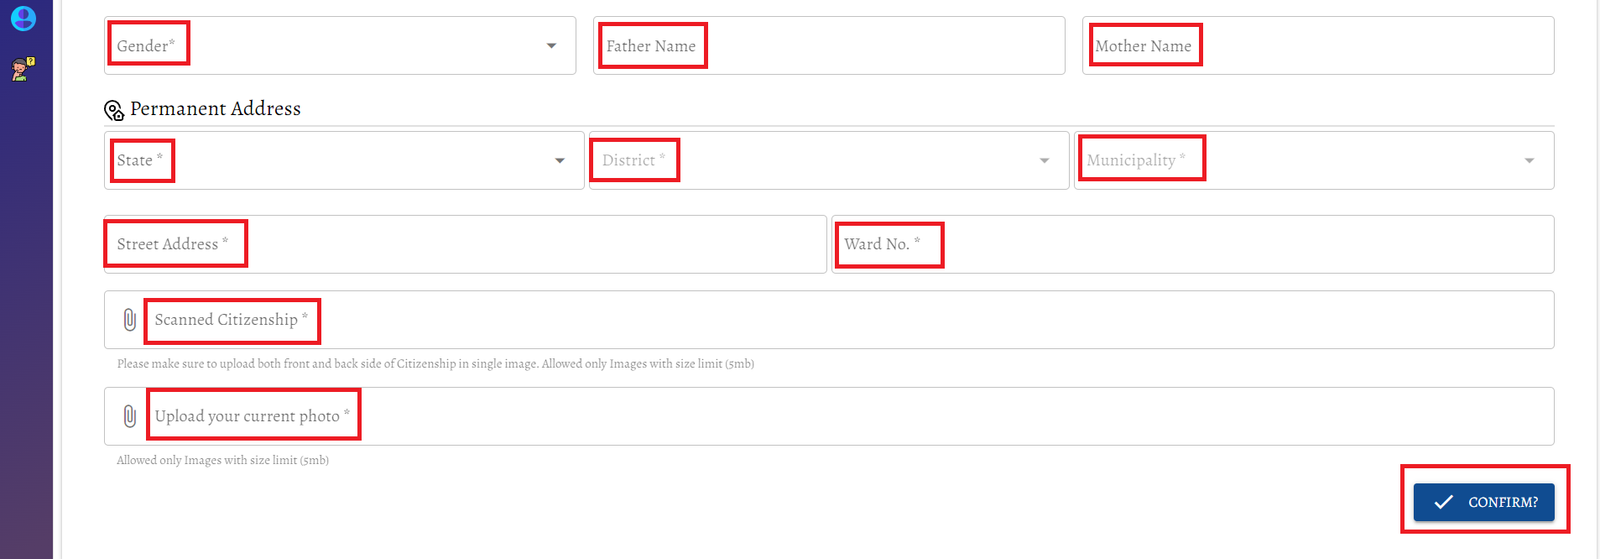
Fill out the Citizenship Setup section with your citizenship number, date of birth, and the district of issue, ensuring it matches your official documents. Then Input your first name, last name, father’s name, mother’s name, and permanent address details accurately. Next, you must upload a combined image of the front and back of your citizenship certificate and your current passport-size photo, ensuring the file is less than 5 MB. After checking that all details are correct, click on the “Confirm” button.
5. Completing the passport setup
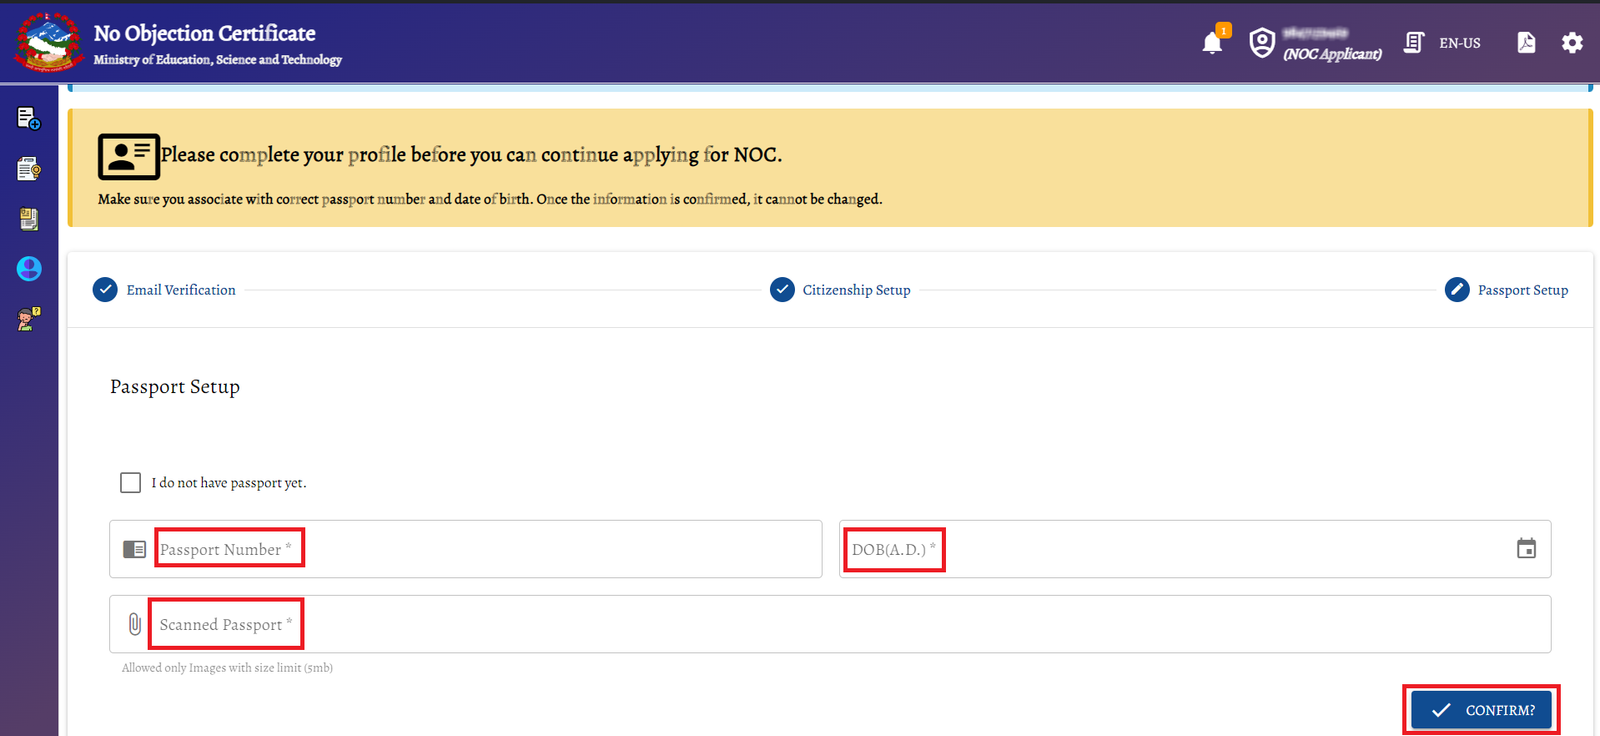
After setting up your citizenship details, move on to the passport setup. If you have a passport, enter the passport number and the date of birth associated with it. You’ll also need to upload a scanned image of your passport. Ensure the scan is clear and that the image file is under the 5 MB size limit. If you don’t have a passport yet, select the appropriate option to indicate this. “Confirm” your details to proceed.
6. Academic background and study plans
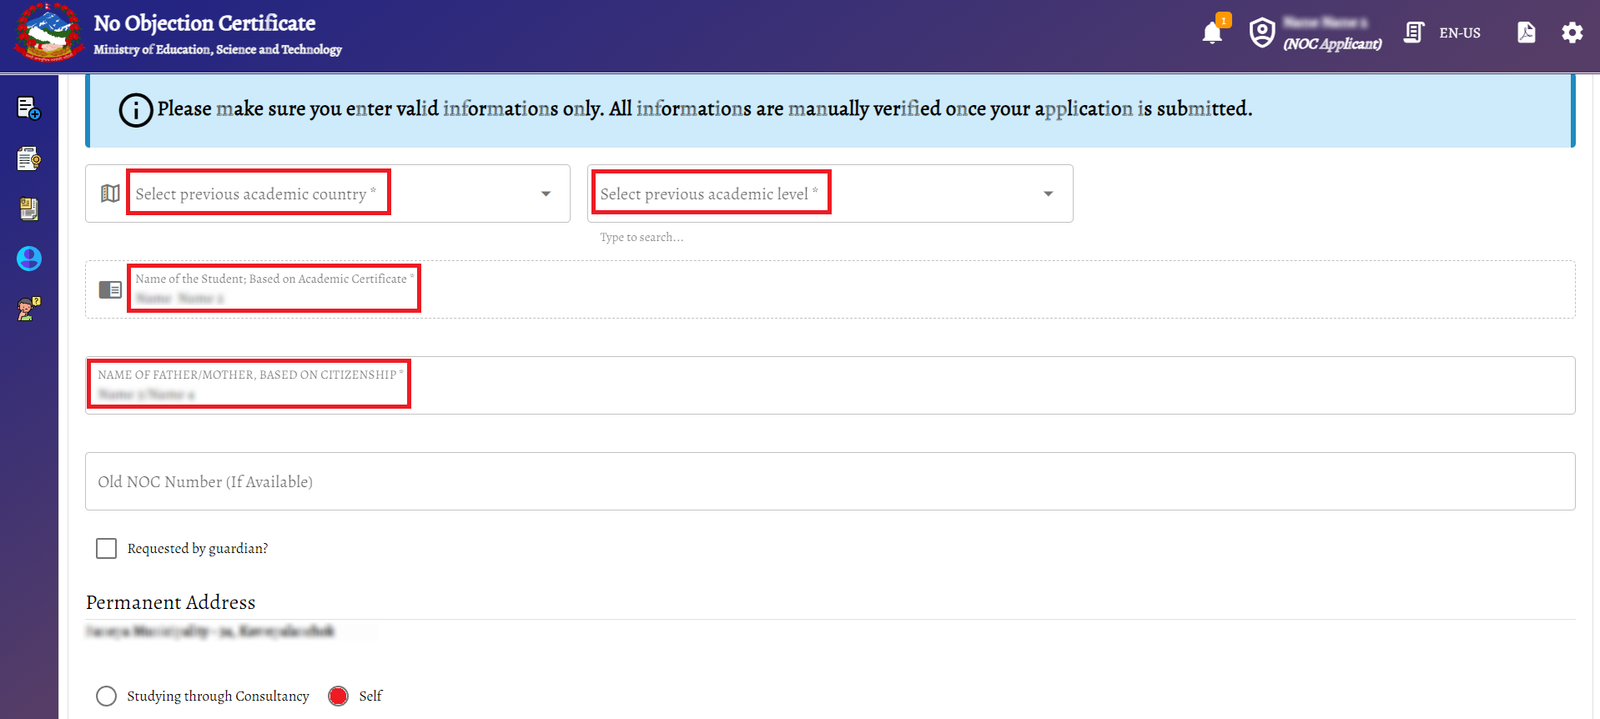
For step 6, you need to provide information about your academic background. Select the country where you previously studied, your academic level, and your field of study. If you have an existing NOC, enter the number; if not, leave that section blank.
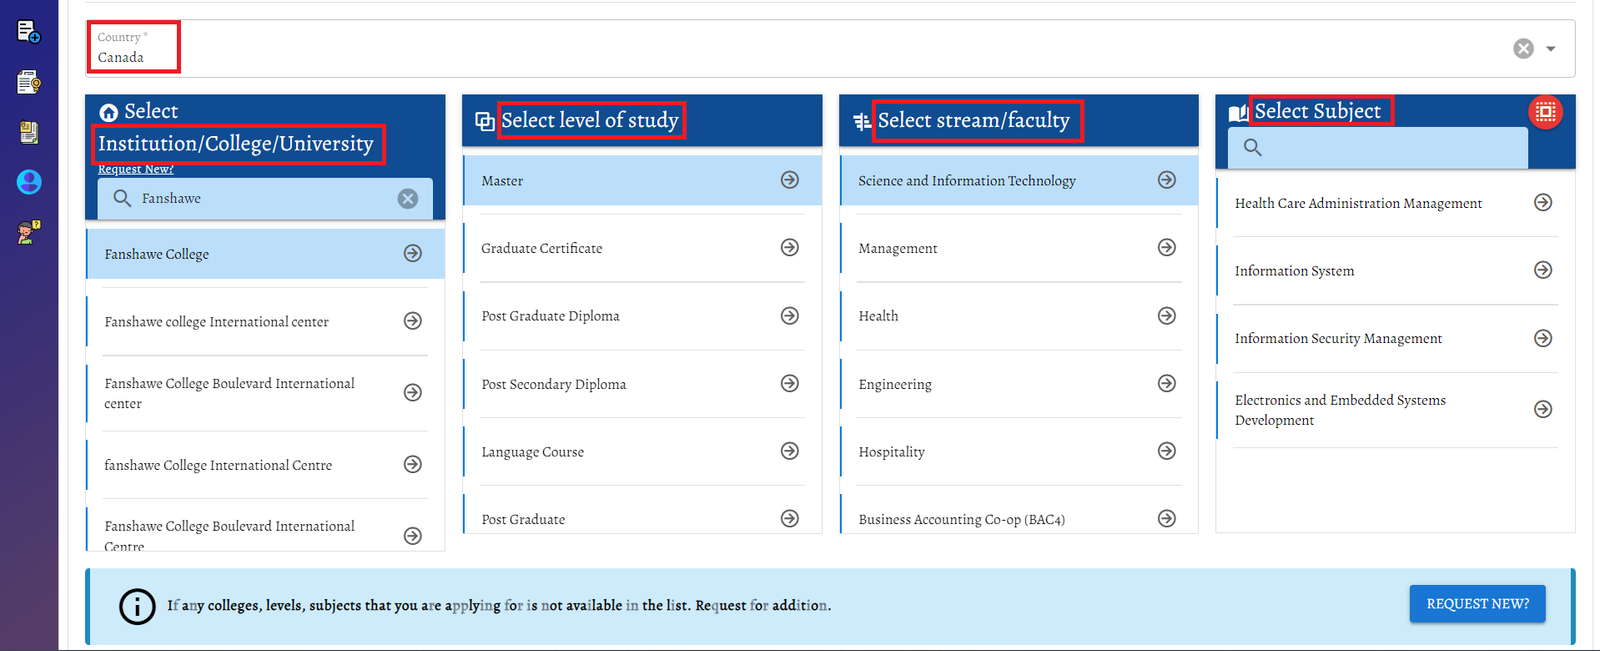
Upon completing these details, a new section will appear asking for your intended study destination. For the purpose of this article, we will select Canada. Then, you’ll be prompted to find and select your future institution; for instance, let’s say Fanshawe College in Canada. Next, choose the level of study you intend to pursue, your stream or faculty, and your specific subject.
If your institute is not listed, there’s an option to request to add your institution. Click on “Request New” and provide the necessary details, and after a few days, the NOC team will verify your institution and add it to the list.
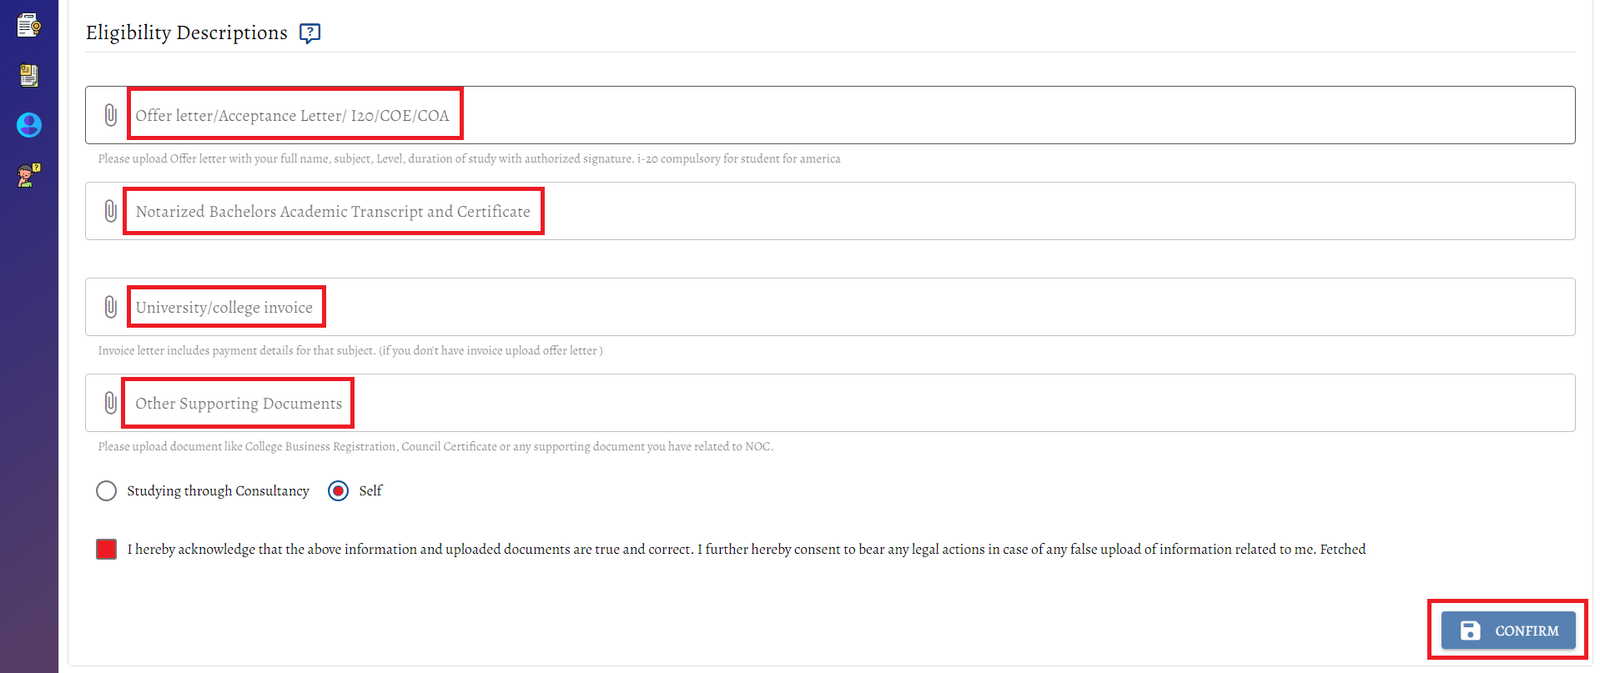
Now, it’s time to upload your documents:
- Offer Letter/Acceptance Letter/I-20/COE/COA: Upload the offer letter provided by your university or college. If you’re applying to the USA, the I-20 will be required instead.
- Notarized Academic Transcript and Certificate: These should be notarized documents, meaning they have been certified by a notary public to confirm their authenticity.
- University/College invoice: If you do not have a university or college invoice, then you can upload an offer letter.
- Other Supporting Documents: In the other supporting documents section, include your language test results and any additional paperwork.
Make sure to mark the “Self” box if you are applying on your own or “Studying through Consultancy” if you’re doing so through an agency. Finally, acknowledge that the information provided is correct, and hit the “Confirm” button to submit your application.
7. Review and submit your NOC application
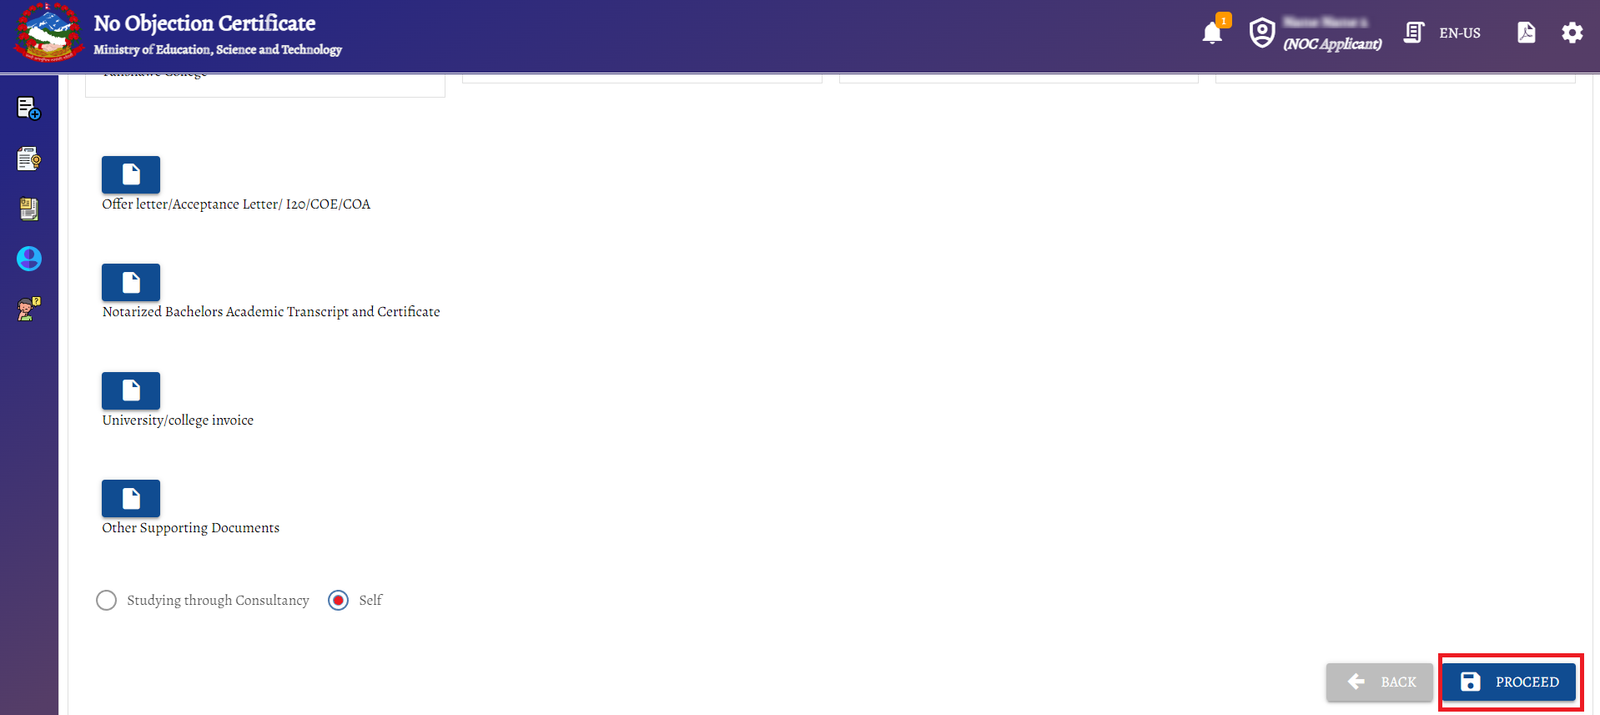
In this final step, take the time to carefully review all the details and documents you have submitted. It is important to ensure everything is accurate because once you submit your application, you will not be able to make changes. Once you’ve reviewed everything, click the “Proceed” button. This action finalizes your submission, and your NOC application is then officially submitted online.
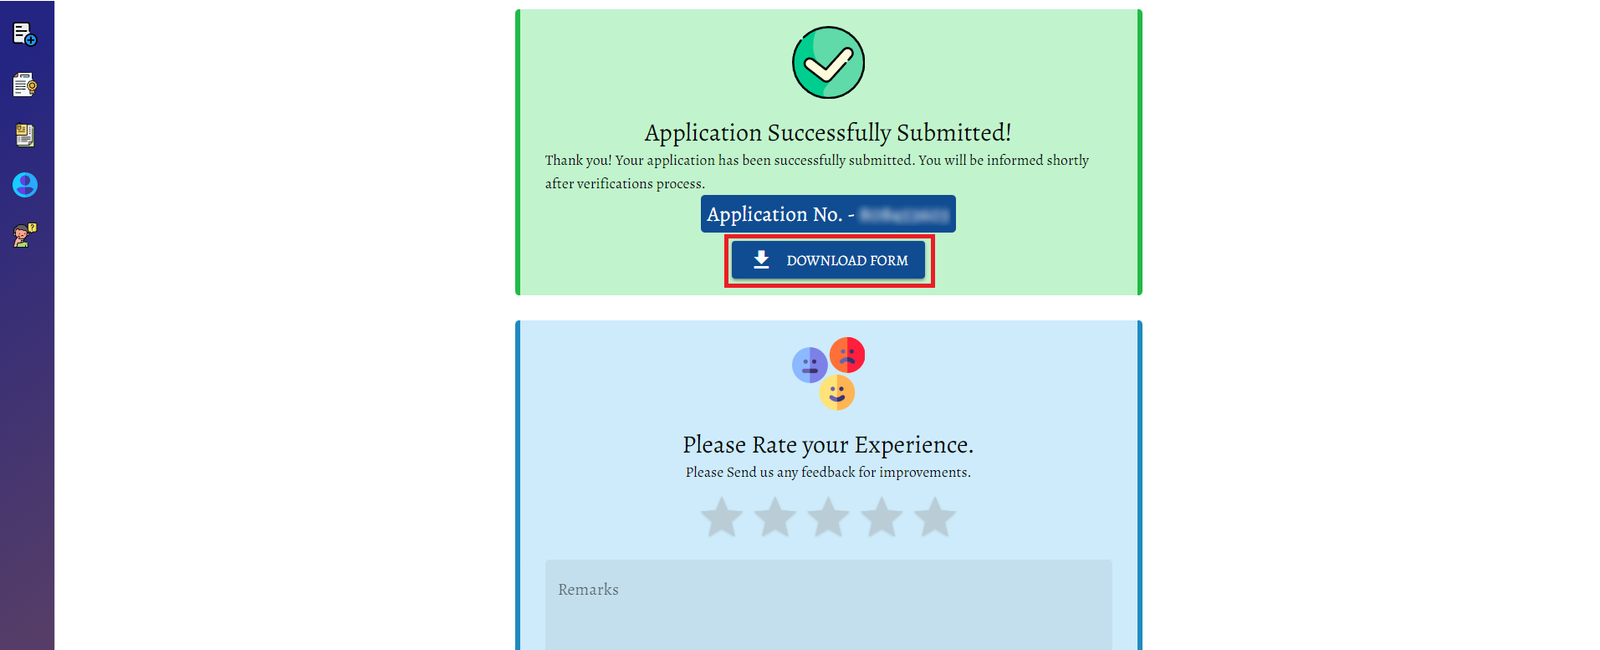
Following submission, you will be directed to a confirmation page displaying your application ID and a “Download Form” button. Make sure to download this form and save it, as it contains all the details you filled up online and will be needed for future reference.
The next steps after applying for your NOC online application
Once you’ve applied for your NOC, here’s what you do next:
1. Monitoring your application status:

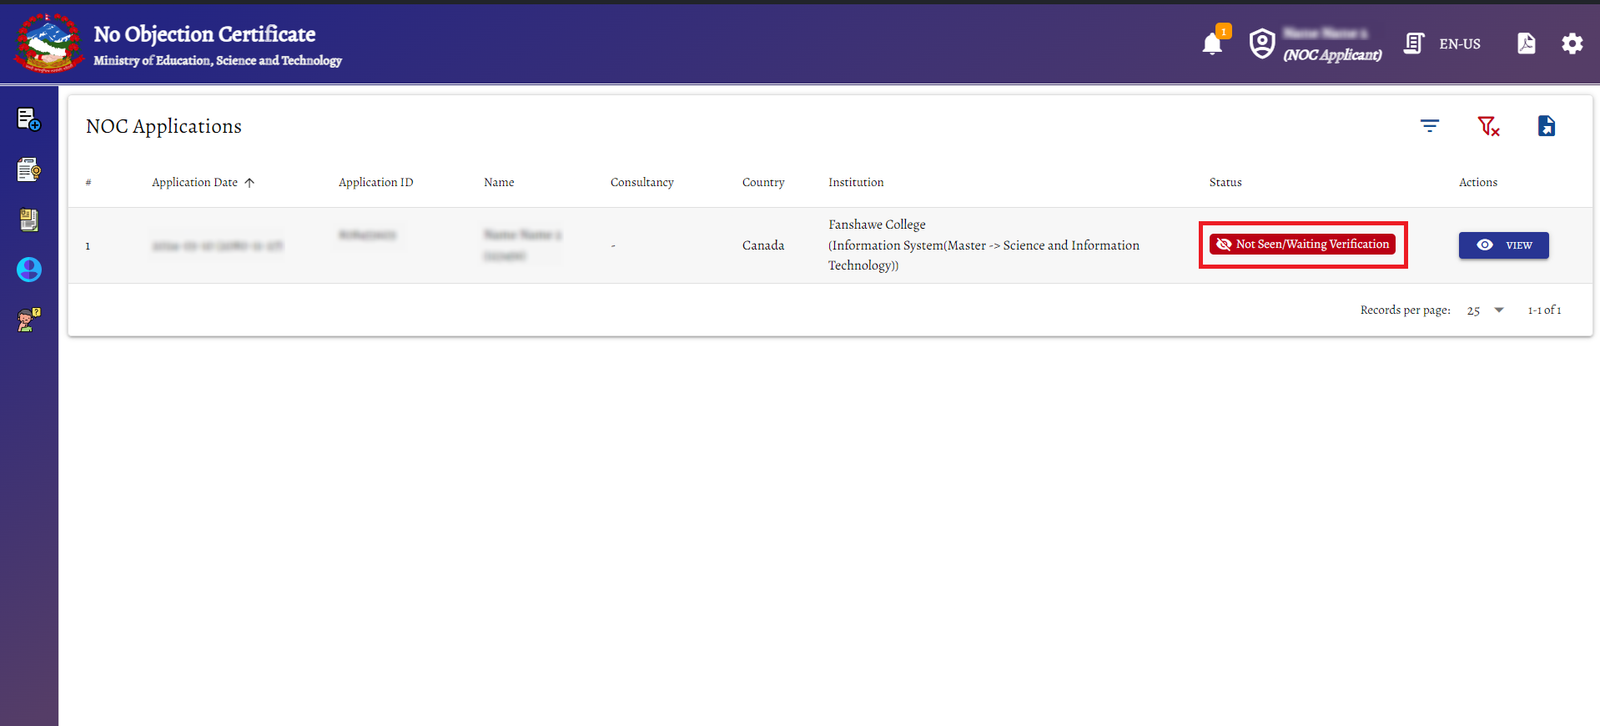
Visit the submission page and look for the ‘My NOC’ section on the left side. Initially, your status will likely display as “Not Seen/Waiting for Verification.” If all the documents and details are correctly submitted, the status should update to “Application Verified/Waiting for Payment” within a few days.
2. After your NOC application is verified

- Making the payment: When the status changes to “Application Verified/Waiting for Payment,” you can proceed with your payment. For payment, you’ll be required to pay NPR 2,000. This fee can be paid at Rastriya Banijya Bank, or you can pay through online payment methods such as Khalti or eSewa. But make sure to save the payment receipt, as you’ll need it later.
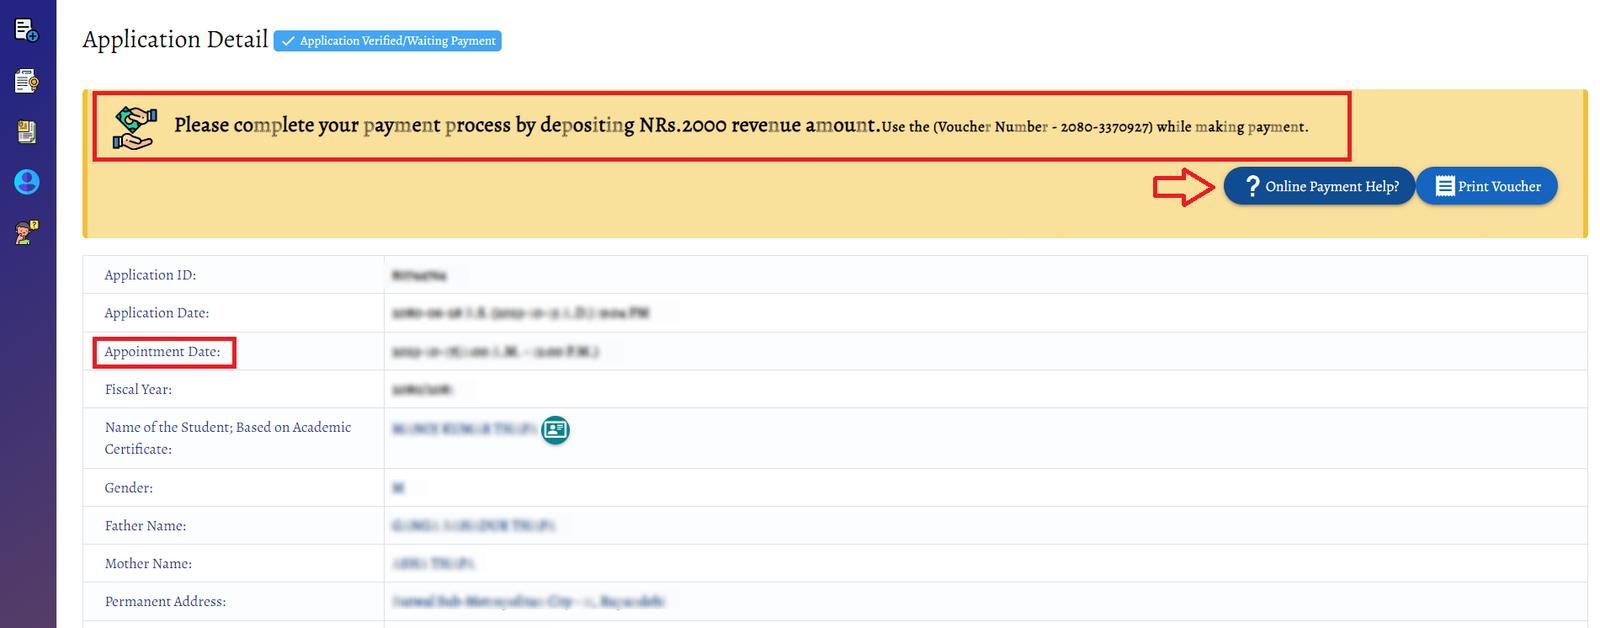
- Appointment scheduling: After payment, the NOC system will provide you with an appointment date and time. You must visit the NOC office at Sanothimi, Bhaktapur, Nepal, as per the schedule. This visit is usually to receive your NOC.
- When visiting the NOC office, bring these documents: This includes your offer letter or I-20 form, all the academic certificates you’ve uploaded during the online application, and the receipt for your NOC fee payment. Don’t forget the NOC form that you downloaded earlier. Additionally, you’ll need to bring both your original passport and a photocopy of it, as well as your citizenship certificate and its photocopy.


